Every producer knows this feeling. You spend hours building a track — layering synths, tweaking melodies, dialing in the perfect bassline — and then suddenly it hits you: the whole song would sound way better in a different key.
Maybe the vocals sit awkwardly. Maybe the drop doesn’t have the energy you imagined. Or maybe another key just feels… right.
And then comes the painful realization: changing it manually means opening every single piano roll and dragging notes around one by one. Hundreds of them. Instant creativity killer.
The good news? FL Studio actually makes this way easier than most people realize.
Instead of painfully transposing every melody, chord progression, and bassline by hand, you can shift almost your entire project into a new key in just a few clicks. Fast, clean, and without destroying your workflow halfway through.
The Problem: The Tedious Task of Manual Transposition
When a project is packed with dozens of separate MIDI patterns, changing the key the “traditional” way quickly turns into a nightmare. You end up opening piano roll after piano roll, selecting notes, nudging everything up or down by a few semitones, then repeating the same process over and over again.
It’s tedious. Repetitive. And honestly, it completely kills momentum.
Even worse, it’s ridiculously easy to miss something — one forgotten melody or bass pattern hiding somewhere in the project, suddenly playing in the wrong key while everything else has shifted.
Thankfully, you don’t have to do any of that.
FL Studio has a much faster way to transpose your entire track, and once you know it, you’ll probably never go back to moving notes manually again.
The Solution: A Lightning-Fast Transposition Shortcut
FL Studio actually has a super underrated feature that makes this whole process ridiculously fast. Instead of digging through every piano roll manually, you can select and transpose all instances of a pattern directly from the Playlist view.
In practice, that means you can shift the key of an entire track — melodies, chords, basslines, everything — in less than a minute. No endless clicking, no breaking your workflow, and no wasting half an hour moving notes around by hand.
Here’s the simple step-by-step process:
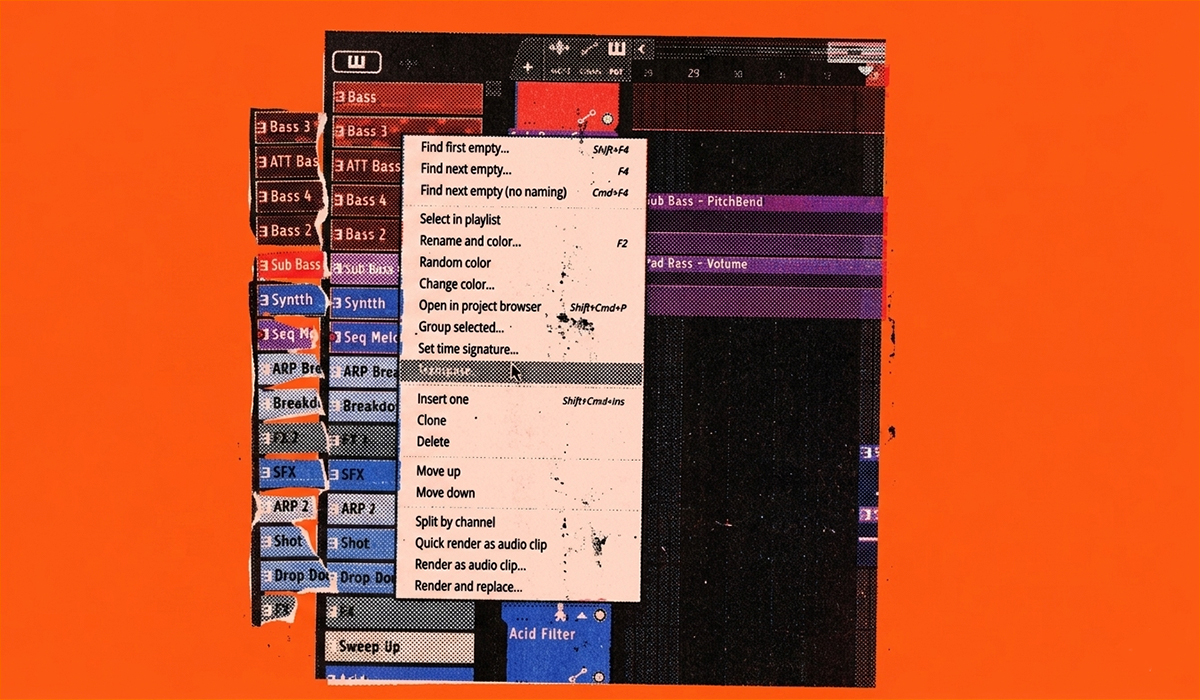
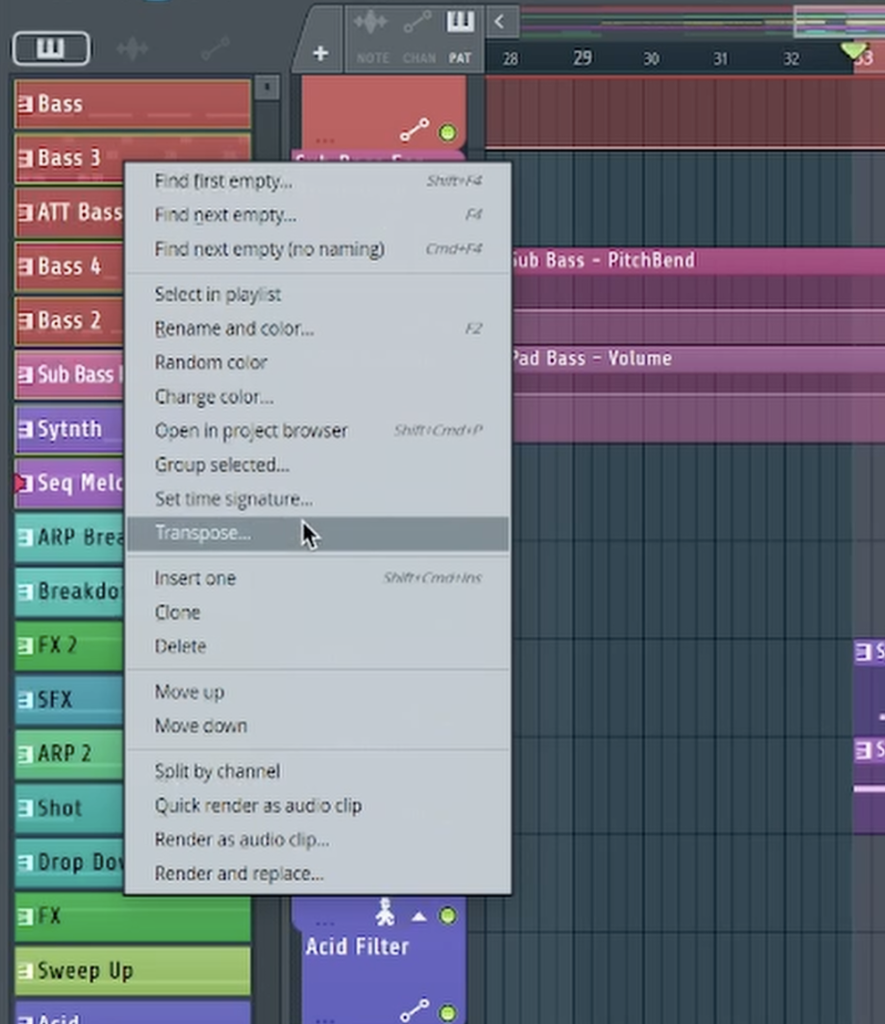
- Select All Clips of an Instrument: In the “Picker Panel” on the left side of the playlist (the list of all your patterns), hold down the ‘Alt’ key and right-click on the pattern you want to transpose (e.g., your main synth melody). This will automatically select all instances of that pattern throughout your entire arrangement.
- Open the Transpose Tool: While the pattern is still selected in the Picker Panel, right-click it again to open the context menu. Select the “Transpose…” option.
- Choose Your Semitones: A small window will pop up asking for a value in semitones. Enter the number of semitones you want to shift your notes. For example, enter “2” to move everything up by two semitones, or “-2” to move everything down.
Repeat this for all the melodic elements in your project — chords, leads, pads, basslines, arps — and you can completely change the key of your song in a fraction of the time the manual method would take.
And honestly, once you start using this workflow, it’s hard to go back.
It makes experimenting feel effortless. You can quickly test different keys, see which one gives the track more energy, more emotion, or simply fits a vocalist’s range better — all without tearing apart your entire project in the process.
Sometimes a song only needs to move up or down a couple of semitones to suddenly click. And with this method, trying those ideas takes seconds instead of killing an entire session.
To see this incredibly fast workflow trick in action, be sure to watch the full video!