Reverb is one of those effects that can instantly make a sound feel bigger, wider, and more alive. But it’s also incredibly easy to overdo. Throw too much reverb on a pluck or lead — especially something fast and rhythmic — and suddenly everything starts washing together into a blurry, muddy mess.
That’s why a lot of professional producers use something called reverb ducking. Instead of letting the reverb constantly sit on top of the sound, the reverb pulls back while the main synth is playing, then blooms naturally in the empty spaces between notes. The result? You keep all the atmosphere and depth without sacrificing clarity or punch.
Normally, setting this up involves sidechain compression, extra routing, and a bunch of DAW tricks. Effective, sure… but not exactly elegant.
What a lot of people don’t realize is that Serum can actually do this on its own.
Using Serum’s modulation system, you can build a clean, self-ducking reverb patch directly inside the synth — no external plugins, no complicated routing, no sidechain setup. Just a tighter, more professional sound that stays crisp even with huge amounts of space and ambience.
The Secret: Using an Inverted Envelope as a Trigger
The magic behind this technique lies in using one of Serum’s envelopes to control the reverb’s mix level. By setting up a specific envelope shape and inverting its modulation, you can tell the reverb to turn on only when a note is released.
Here’s the step-by-step guide to achieving perfect reverb ducking:
- Add Reverb in the FX Rack: First, navigate to Serum’s “FX” tab and add a Reverb module. Dial in the size, decay, and tone of the reverb to your liking, and turn up the “Mix” knob so you can hear the effect.
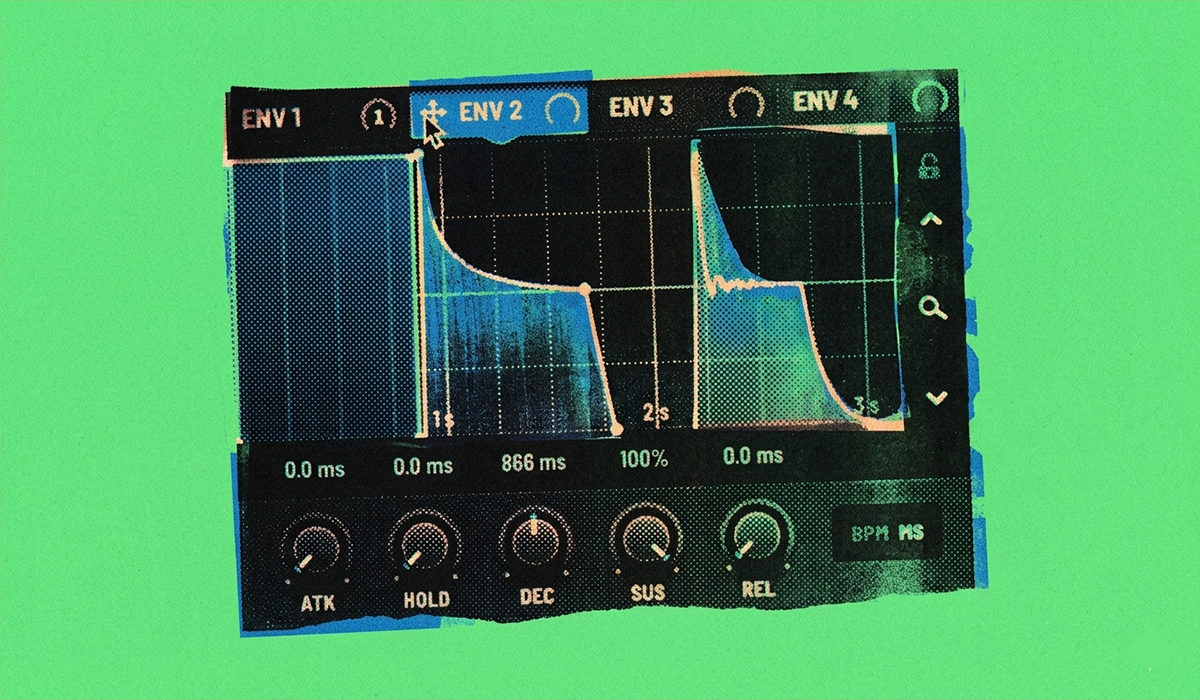
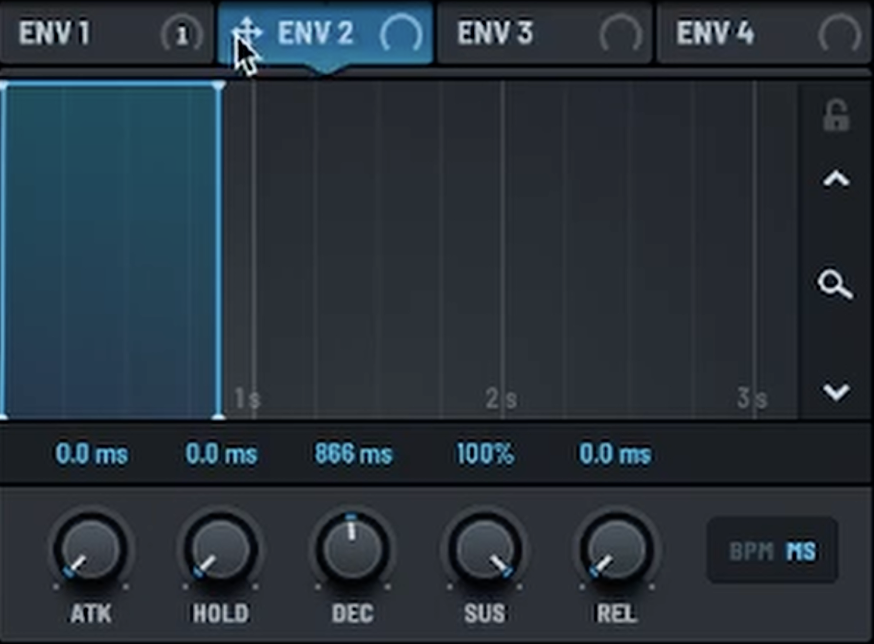
- Configure a “Gate” Envelope: Go to an unused envelope, for example, ENV 2. We need to shape this into a “gate” envelope that acts as an instant on/off switch. Set the parameters as follows:
- Attack: 0 ms
- Hold: 0 ms
- Decay: The decay time doesn’t matter for this effect.
- Sustain: 100%
- Release: 0 ms
This creates an envelope that instantly jumps to its maximum level when a note is pressed and instantly drops to zero when the note is released.
- Route and Invert the Modulation: This is the most crucial step.
- Click and drag the ENV 2 modulation source (the small crosshair icon) onto the Reverb’s “Mix” knob.
- By default, this will make the reverb turn on with the note. We want the opposite. To invert it, find the small blue line that has appeared next to the Mix knob. Click and drag the blue modulation dot downwards until the modulation is fully negative.
The Result: Clean, Professional Reverb Tails
Now here’s where the magic really happens.
When you press and hold a note, the envelope stays at 100%. But because the modulation is inverted, the reverb mix is effectively pushed down to 0%. In other words, your synth plays almost completely dry while the note is active — clean, upfront, and punchy, with none of that washed-out blur getting in the way.
Then, the second you release the key, everything flips.
The envelope drops instantly, which causes the reverb mix to swell back up to full volume. Suddenly, this huge atmospheric tail blooms out after the note instead of fighting with it while it’s playing. It feels smooth, spacious, and surprisingly natural.
That’s the secret behind why the sound stays so clear even with tons of reverb. The ambience fills the gaps around the synth instead of sitting directly on top of it, so your mix keeps all the depth without turning muddy.
To see this incredible sound design technique in action, be sure to watch the full video!