Pitching samples is a fundamental part of modern music production, but it often comes with a frustrating side effect: as you change the pitch, the timing and length of the sample can become warped, throwing off your entire groove. If you’ve ever struggled to repitch a vocal or melody without it sounding like a garbled mess, you need to know about this professional technique using FL Studio’s native sampler.
This is the best way to get clean, precise, and creative results when pitching your audio samples.
Why “Stretch” Mode is Your Best Friend
The key to this entire technique lies within a specific setting in FL Studio’s Sampler channel. When you load a sample, the default time-stretching mode is often “Resample,” which can cause the length of the audio to change as you alter its pitch.
To avoid this, the first and most crucial step is to change the Mode to “Stretch.” This algorithm is specifically designed to preserve the original duration of the sample, no matter how much you pitch it up or down.
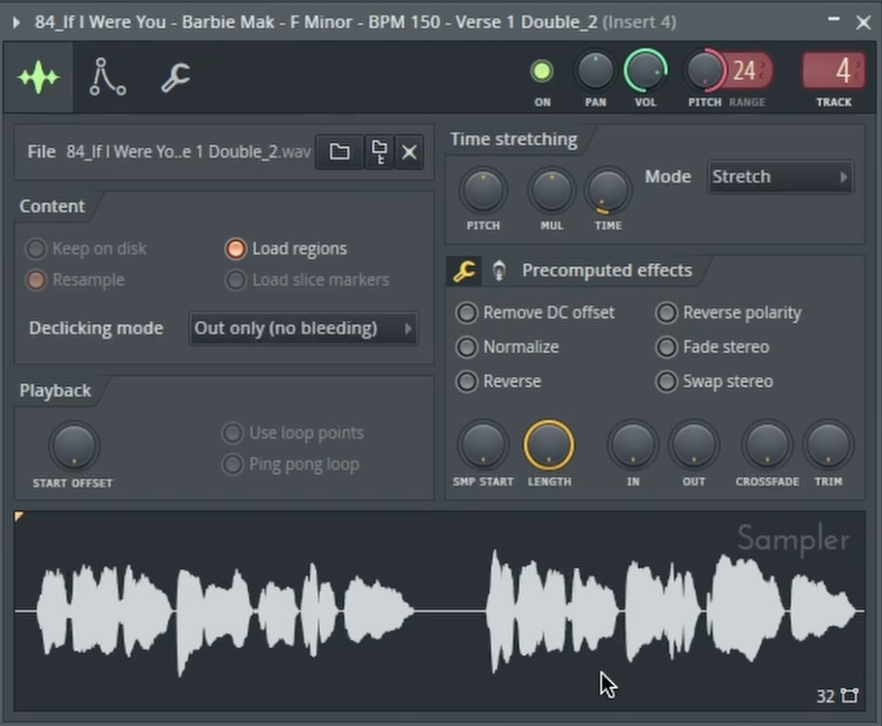
Mastering the Pitch Range Knob for Precise Control
With “Stretch” mode active, your new best friend is the Pitch Range knob (labeled “RANGE”). This dial determines the maximum number of semitones you can pitch the sample up or down. Understanding how this works is the secret to musical accuracy.
Here’s the simple music theory breakdown you need to know:
- An octave on a piano consists of 12 keys (semitones).
- Setting the Pitch Range to 12 gives you a full octave of control. Pitching down by 12 will lower the sample by one octave.
- Setting the Pitch Range to 24 will give you a two-octave range.
A Practical Example: Transposing Your Sample
Let’s say you have a vocal sample that’s in the key of F minor, but your track is in C minor. Instead of guessing, you can transpose it perfectly using this method.
- Count the Semitones: Look at a piano keyboard. To get from F down to C, you need to move down 5 semitones (F > E > Eb > D > Db > C).
- Set the Pitch Range: In the Sampler, set the Pitch Range knob to 5.
- Pitch It Down: Now, when you automate or move the main Pitch knob all the way down, the sample will be perfectly transposed to C minor, maintaining its original timing and quality.
You can also use this same logic to pitch samples upward. This precise control ensures your samples are always perfectly in key with the rest of your track, opening up a world of creative possibilities.
The vocal sample used in this demonstration, along with thousands of others, can be found on Slooply.com.
To see this professional pitching technique in action and hear how clean the results are, be sure to watch the full video!