
Ever wanted to add that sought-after, tape-stop-style slow-motion effect to your tracks? You might be surprised to learn that you can achieve this popular sound with just a few clicks in Ableton Live, using a tool you already have at your fingertips. Read on to discover how to create this dynamic effect and give your music a professional edge.
Four Clicks to a Perfect Slow-Down
This surprisingly simple technique revolves around clever use of Ableton Live’s native “Delay” audio effect. By manipulating its parameters in a specific way, you can transform a standard audio clip into a warping, slowing-down masterpiece.
Here’s how to do it:
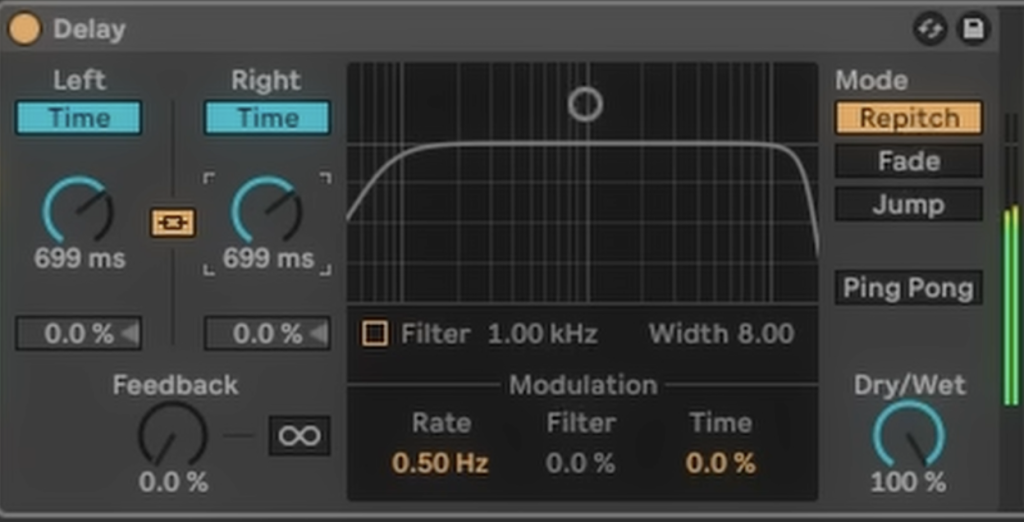
- Add a Delay: Start by dragging and dropping the “Delay” audio effect onto the track you want to process.
- Feedback to Zero: In the Delay device, locate the “Feedback” parameter and turn it all the way down to 0%. This prevents any repeating echoes, which aren’t needed for this effect.
- Disable Filter and Sync: Turn off the filter section of the delay. Then, crucially, disable the “Sync” buttons. This will switch the delay time from being synced to your project’s tempo to being measured in milliseconds.
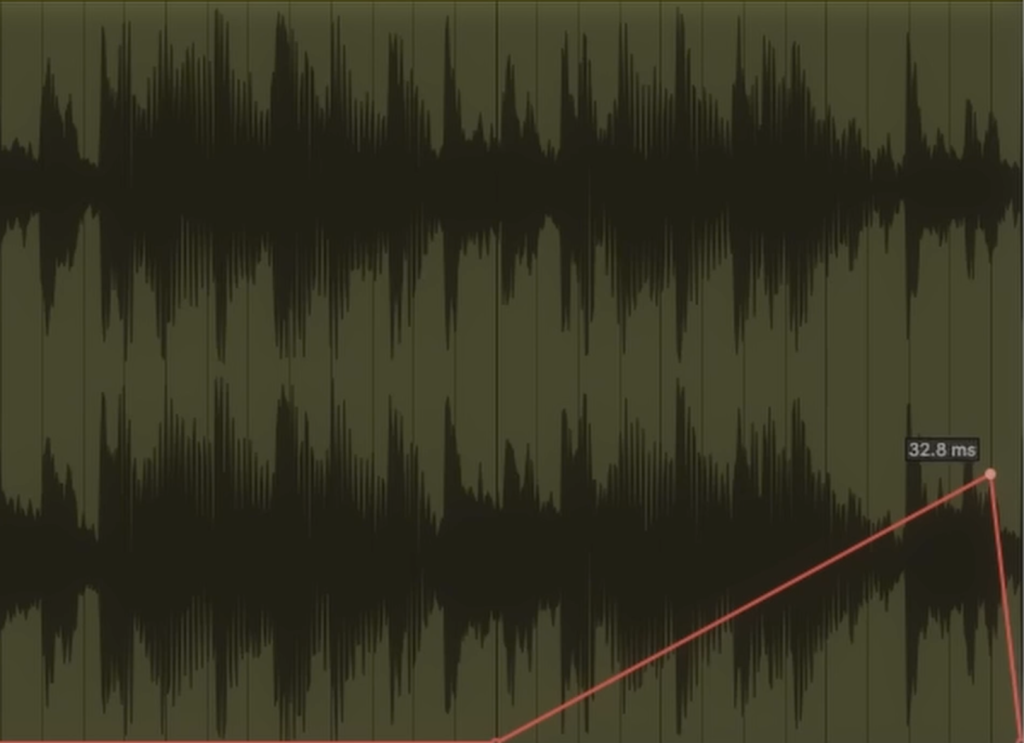
- Automate the Time: Now for the magic. Set the “Dry/Wet” knob to 100% wet.Then, create an automation lane for the delay “Time” parameter. By drawing an upward slope in the automation lane, you will cause the audio to smoothly decrease in speed, creating that classic slow-motion sound. The steeper the slope, the more dramatic the effect.
By automating the delay time, you can precisely control the length and curve of your slow-down, making it a versatile tool for transitions, drops, and creative flourishes.
Fine-Tuning Your Sound
To get the most out of this technique, make sure the delay’s mode is set to “Repitch.” This setting ensures that as the delay time changes, the pitch of the audio is also affected, which is key to achieving the desired tape-stop effect.
For a visual guide on how to perform this slow-motion trick and to see it in action, be sure to watch the video below