Have you ever found that your vocals, despite your best efforts, sound muddy, get lost behind the instruments, or just lack that professional polish? A very frequent cause is one common mistake in applying reverb. In today’s post, based on a short and insightful video tutorial, we’ll show you how to easily take your vocal mixes to the next level.
Why Is Putting Reverb Directly on a Track a Mistake?
Many beginner music producers make the same error: they add a reverb plugin directly onto the vocal track as an “insert” effect. While this seems logical and is the quickest way, it leads to several problems:
- Lack of Clarity: The reverb “smears” the original vocal signal, making it less clear and harder for it to cut through the rest of the instruments.
- Pushing the Vocal Back: A vocal with reverb applied directly gets pushed back in the mix, losing its presence and energy.
- Less Control: You have limited control over the effect itself. You’re blending the “dry” and “wet” signals on a single track, which makes precise sound shaping difficult.
As shown at the beginning of the video, this approach often results in a “muddy,” unprofessional sound.
The Pro Technique: Reverb on a Send with Sidechain Magic

Instead of adding reverb as an insert, we’ll use a send/return channel. This will give us full control and allow us to achieve a clean, spacious sound. Below, we explain the technique shown in the video step-by-step.
Step 1: Create a Return Track
In your DAW (the video uses Ableton Live, but the principle is the same in any other software), create a new Send or Return track. This is a special channel where we will send the signal from our main vocal track.
Step 2: Add Reverb and Set it to 100% Wet
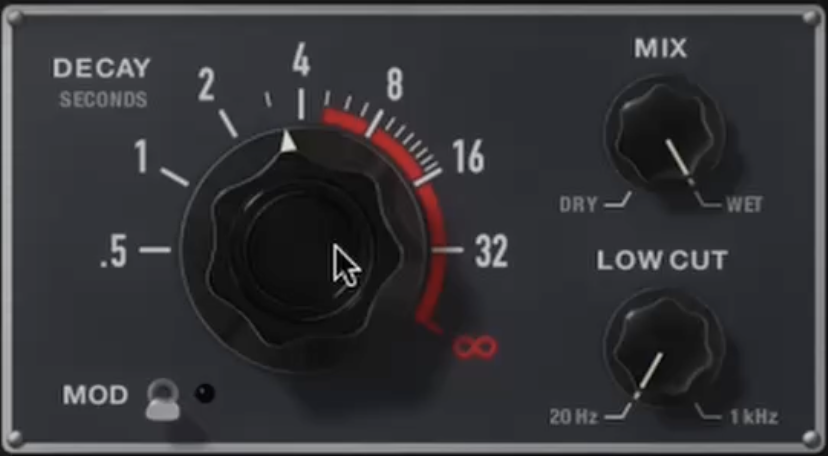
On the newly created return channel, place your favorite reverb plugin (the video features the Soundtoys Little Plate). The key step here is to set the Mix (or Dry/Wet) parameter to 100% Wet. This ensures that this channel will only output the processed reverb signal, without any of the original, “dry” vocal.
Step 3: Add a Compressor with Sidechain
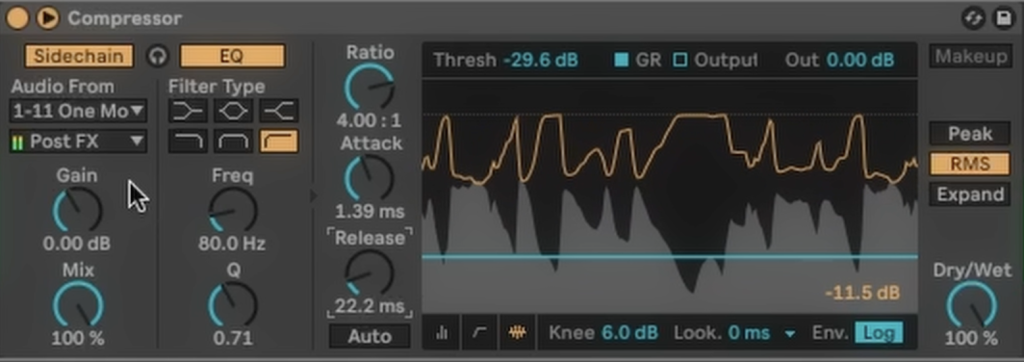
This is the secret to a professional sound! Right after the reverb plugin, on the same return channel, add a compressor. Then:
- Activate the Sidechain mode in the compressor.
- Set the source signal (“Audio From”) for the sidechain to your original, dry vocal track.
This setup makes the compressor “duck” or lower the volume of the reverb whenever the vocalist is singing, and lets the reverb’s tail bloom in the pauses between phrases. The result? The vocal stays upfront, clear, and intelligible, while being surrounded by a beautiful, controlled space.
Step 4: Send the Vocal Signal to the Reverb Channel
Go back to your main vocal track and use the “Send” knob to start sending the signal to the reverb channel. This knob now acts as your reverb amount control. Adjust it to a level that gives you the desired depth without sacrificing vocal clarity.
Summary of Benefits
By using this technique, you gain:
- Maximum Vocal Clarity: The voice is not “covered” by the reverb.
- Professional Depth and Space: The reverb fills the empty spaces, creating a cohesive and expensive-sounding mix.
- Full Control Over the Effect: You can process the reverb signal itself (e.g., with an EQ) without affecting the original vocal track.
This simple change in your approach to vocal processing can dramatically transform the quality of your productions.
We encourage you to watch the original video, which perfectly illustrates the entire process in just 30 seconds.